If you have a system that has been diagnosed with a refrigerant leak (also referred to as a freon leak) it may be tempting to re-charge the unit, thank your HVAC technician and send him on his way. Unfortunately, without a proper leak check you are guaranteeing yourself a future return visit for the same issue. The length of time that your system will function could vary from a couple of days to a couple of months, depending on the size of the leak. Leak checks are performed in three phases, as needed.
Phase One: Preliminary Leak Check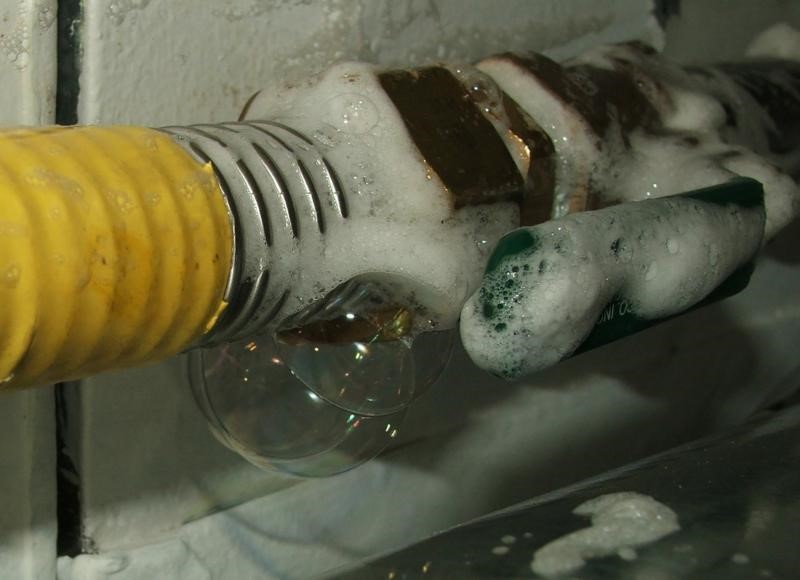
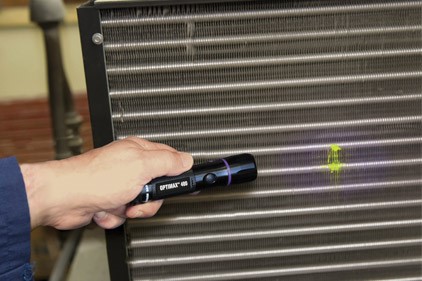
Upon discovering a unit is low on refrigerant the first step is checking all fittings and coils on the system using a mix of electronic leak detection tools and a soap/bubble mixture. All fittings are checked for proper seating & placement and are tightened/re-sealed if needed. This typically takes 2-4 hours depending on the system. The best-case scenario is that the leak is located at a fitting that can be tightened to stop it. The unit is then recharged and the work is complete.
It should be noted that if a unit is found to be low on refrigerant during inclement weather (heavy winds, rain, etc.), the leak check will need to be re-scheduled as this type of weather throws off leak detection instruments and reduces visibility to see small signs of leaks.
Phase Two: Leak Sealant / Dye
If no leaks are located during the preliminary leak check of the fittings and coils your technician has two options for the next step. The technician can begin phase two or skip this step and go directly to phase three. If the system appears to have a small/slow leak he or she can attempt to seal the leak with a Refrigerant Leak Sealant. The sealant is colored green so if the leak is small enough it will seal but if it is too large and requires further troubleshooting there should be traces of the dye present at the source of the leak.
This type of sealant is still fairly new and has not yet been perfected, so it should be noted that the sealant could leave behind no trace, even if it leaks out of the system. If this occurs and the leak is still present but not yet located, your technician should move on to Phase Three. Phase Two also only works on systems up 5 tons, for larger units your technician should move from Phase One to Phase Three.
Phase Three: Pressurization, Evacuation
The third phase of leak checking is the most comprehensive of the phases. If a leak cannot be located with a preliminary check or sealed with a leak sealant, the next step is to remove (or “recover”) all the refrigerant and charge the system with nitrogen to do a comprehensive leak and pressure test. With nitrogen and trace amounts of refrigerant in the system a leak should be able to be pinpointed by going through it again with a leak detector and soap bubbles. If a leak is found and repaired, the system will be evacuated, re-charged and started back up. The existing refrigerant that was evacuated will be tested to see if it can be reused or if fresh refrigerant is needed. Certain refrigerants require a “virgin” recharge, in which case new refrigerant will always be used. Phase three typically requires 5-8 hours, + the cost of refrigerant and nitrogen. This timeframe will vary based on the type and size of equipment.
The worst-case scenario in a leak check is that it is located in one of the coils (either evaporator or condenser coil). If this occurs, your technician can determine if the coil is repairable or not. Unfortunately, coils are sometimes not possible to repair depending on where the leak is. If the leak is in a non-repairable spot, the resolution will require coil replacement, or a full system replacement.
If you have any questions regarding the best approach for your system, please call our team at 781-365-0222. A qualified member of our team will be happy to further discuss.
